Turning leftover yarn into charming crochet bags is one of my favorite ways to avoid waste and get creative at the same time. Whether you’re tidying up after a big project or have piles of half-skeins collecting dust, crocheting bags can bring those bits and bobs back to life. I’m going to share some practical steps, cool ideas, and helpful tips to help you transform leftover yarn into unique, useful bags you’ll actually want to carry.
Why Crocheting Bags with Leftover Yarn Is Worth Trying
Crochet bags are basically the perfect project for leftover yarn. No matter how much or how little you have, you can make something unique. They don’t require a ton of planning and let you mix colors, experiment with textures, or try out new stitches without worry. For beginners, it’s an easy way to improve skills and use up supplies. For more experienced crocheters, it’s a great chance to let your creativity loose.
Yarn isn’t cheap, and throwing away leftovers feels wasteful. Even small balls of yarn can come together to make eye-catching stripes, patchwork designs, or fun motifs. Around the world, makers are embracing sustainable crafting, and projects like these show that upcycling is both practical and pretty fun. You can read more about the zero-waste trend in fiber arts at sources like Interweave’s zero-waste crochet projects.
Getting Started: Prep Work for a Smooth Crochet Bag Project
I always recommend a little prep before grabbing your hook. Getting organized means fewer stops and a more relaxing time. Here’s how I sort things before crocheting a bag with leftover yarn:
- Gather Leftover Yarns: Pull out all your yarn scraps. Put them in piles by fiber, weight, or color. This helps you figure out what you’ve got.
- Plan Your Colors: Yarn leftovers often don’t match, but that’s totally fine. Choose a color palette, go full-on rainbow, or opt for color blocking to keep things looking intentional.
- Pick a Hook: Use a hook that matches your thickest leftover yarn. In general, choosing a slightly smaller hook than recommended gives a sturdier fabric. That’s handy for bags.
- Check Your Stash for Extras: Handles, buckles, zippers, or lining fabric can really take your bag up a notch.
- Find Inspiration: Ravelry, LoveCrafts, and Pinterest have loads of free bag patterns if you need a place to begin.
By investing some time upfront to sort things out, you’ll set yourself up for a smoother adventure. Mix and match favorites, or try putting together unexpected color combinations for an eye-catching effect.
How To Crochet Bags Using Leftover Yarn: Step-By-Step
No two projects look the same when you’re using scraps, but the basic steps apply to almost any style. From small pouches to roomy tote bags, this approach works well for first-timers and those who’ve already got a few projects under their belts.
- Pick a Basic Bag Style: Tote, pouch, bucket bag, or backpack. Start simple! Rectangular totes or basic drawstring bags are perfect for beginners.
- Decide on the Base: Bags usually start with the bottom. Crochet a flat rectangle, oval, or circle, depending on the look you want.
- Work the Sides: Once your base is done, continue crocheting up the sides. Change yarn colors when you run out of a strand or to create color blocks, stripes, or granny squares.
- Add Handles or Straps: Crochet sturdy handles (like single crochet strips or rope-style cords). If you’ve got an old belt, you can upcycle that as a strap.
- Finish Up: Weave in all loose ends. For a neat look, crochet over the tails as you go. Attach handles, add buttons, zippers, or even fabric lining for extra polish.
Choosing simple bag shapes for your first project makes the process less frustrating. Once you’re comfortable, try experimenting with textured stitches or funky shapes for a totally custom result.
Yarn Scraps: What Works Best?
I love mixing yarn weights, but it’s a good idea to stick to one or two categories, such as worsted and bulky, for a more uniform fabric. If your bag looks wobbly, double up thin yarns or hold two strands together to even things out. Cotton and acrylic both hold up well to use and washing. That makes them super popular for crochet bags.
Here’s what I usually keep in mind:
- Sturdiness: Cotton is strong and keeps its shape. Acrylic works in a pinch, especially for colorful designs.
- Texture: Smooth yarns show off stitch details. Fuzzy or novelty yarns add character if used sparingly.
- Colors: Bold colors pop in stripes and granny squares, while neutrals tie everything together.
If you want a little extra structure, try adding a firm base or even a piece of plastic canvas to the bottom of your bag. For touchable texture, mix in occasional textured rows using popcorn or cluster stitches.
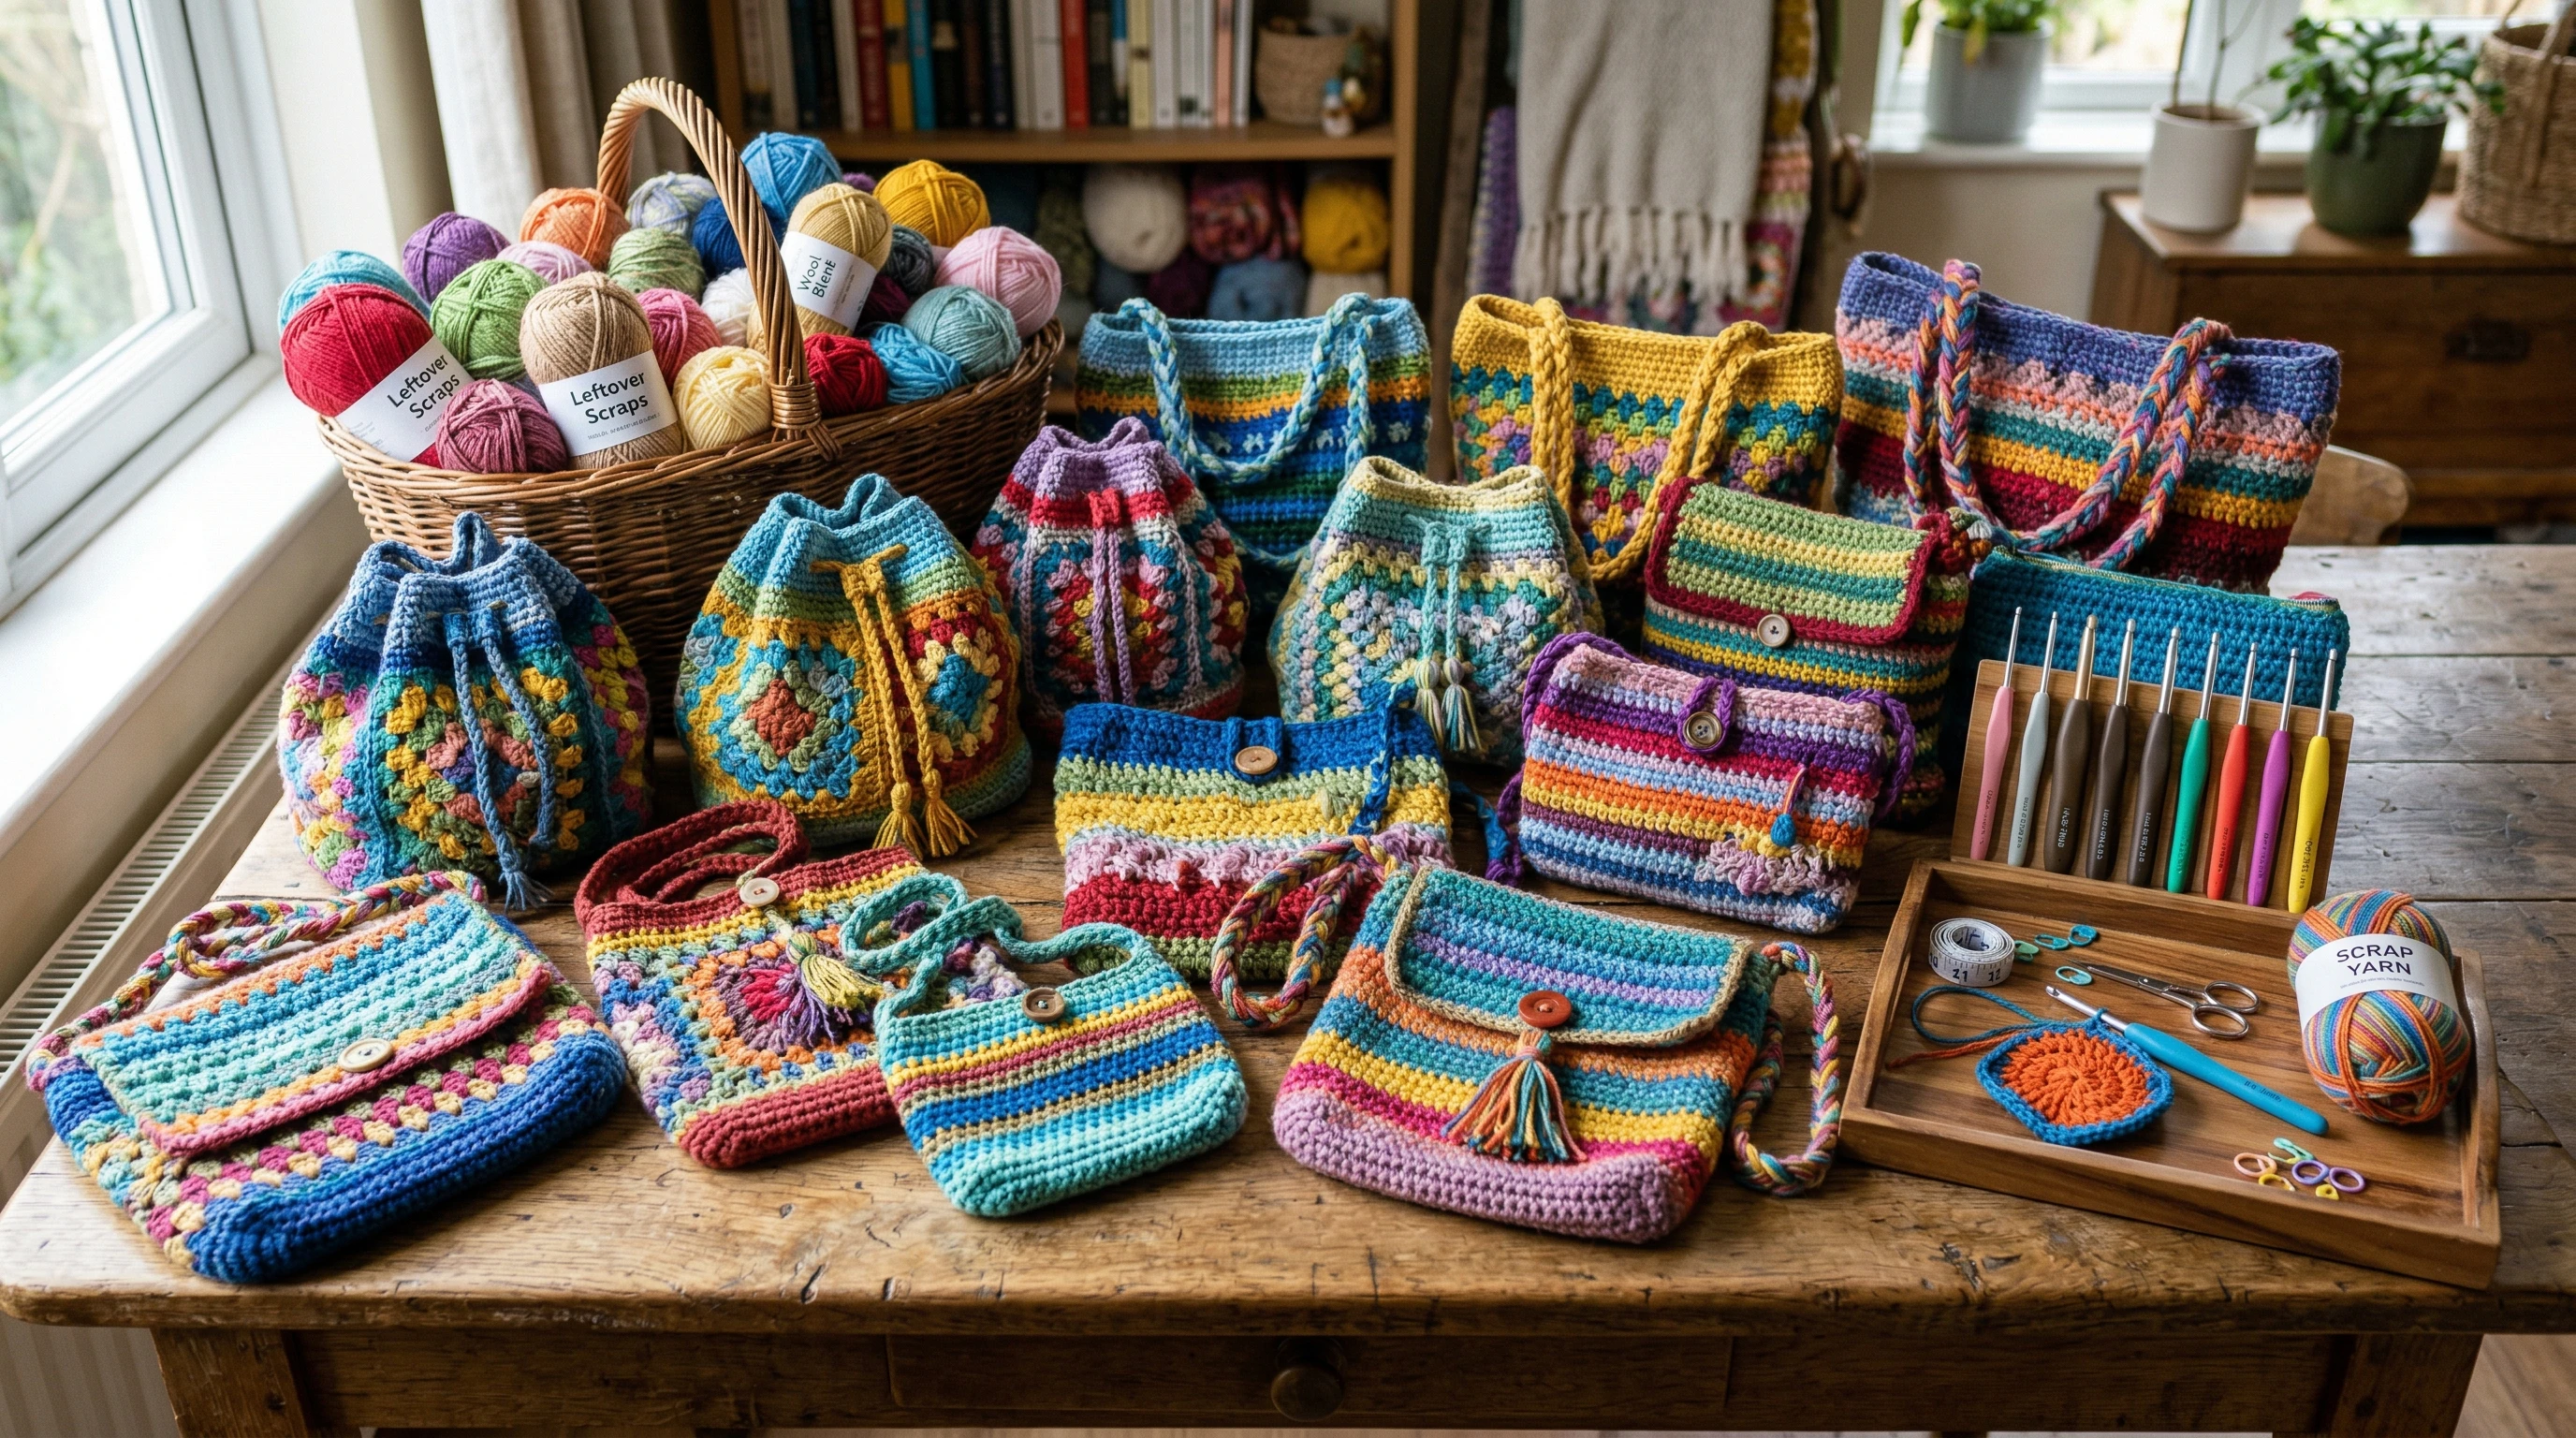
Bags You Can Make with Leftover Yarn (Ideas & Examples)
There are tons of options for crochet bags, from very simple to super detailed. Here are a few of my go-tos when working with scraps:
- Granny Square Tote: Join together brightly colored granny squares. It’s a classic, cheerful look and perfect for beginners.
- Simple Stripe Bag: Use up the tiniest bits by adding a row each time you run out of a color. The stripes make every bag unique.
- Patchwork Project Bag: Sew together small swatches, mix shapes and stitches, then edge with a unifying color.
- Drawstring Pouch: Quick and cute for makeup, electronics, or storing other small crochet projects.
- Market Mesh Bag: Lightweight yarns are great for mesh grocery bags or netted totes. These work up fast and double as eco-friendly shopping bags.
If you want to add some flair, decorate your finished bags with tassels, pom-poms, or appliqué shapes. Attaching unique buttons or thrifted brooches can give your bag extra next-level cool factor and make every bag feel like a personal statement piece.
Common Questions About Crocheting Bags from Leftover Yarn
A few questions pop up all the time. Here’s what you might be wondering:
How do I keep my bag from stretching out?
Using a smaller hook creates a tighter, sturdier fabric. Adding a fabric lining also helps the bag hold its shape. For more structure, choose stiffer stitches or double up yarns.
What if I run out of a color mid-row?
There’s no need to stress. Just tie on a new color and keep going. The more colors, the better! For a cleaner join, try the invisible join technique or crochet over the ends as you go.
Can I combine different fiber types?
You can, with a little attention. Mixing wool, cotton, and acrylic can create texture. Just keep washing instructions in mind, since wools may shrink and cottons might stretch more. Test a swatch before making a big bag.
Extra Tips for an Awesome Project
Making bags from leftover yarn isn’t tricky, but a few tips can make your finished project even better:
Experiment With Stitches: Single crochet is the sturdiest, but half double and double crochet are faster and look just as cool. Puff stitch, moss stitch, or post stitches can add texture and visual interest.
Use a Magic Knot or Russian Join: These joining methods keep your color changes secure and less bulky. There are plenty of YouTube tutorials showing these techniques in action.
Crochet Over Your Tails: Weaving in ends gets old fast. If you crochet over them as you go, there’s much less work once the bag’s finished.
Line Your Bag: For more durable and polished bags, sew in a fabric lining. This step is especially helpful for mesh or lacy bags so nothing pokes out. Pick a lining fabric that complements your colors for a cohesive look.
Real-Life Uses for Crochet Bags
Beyond just looking cute, fiber bags are super useful in daily life. Here are a few ideas:
- Market Trips: Mesh totes are lightweight and expandable, but strong enough for groceries. You’ll be surprised at how much they can carry!
- Storage: Drawstring pouches wrangle cords, pencils, or makeup. They’re handy for kids’ toys or even as travel organizers.
- Project Bags: Keep your current crochet or knitting whip handy with a roomy handmade sack.
- Gifts: Fill a bag with selfcare goodies or treats and gift it. They’re a huge hit! It’s a great way to share both your craft and your commitment to reusing materials.
I’ve swapped out a lot of single use shopping bags for scrappy market totes, and I use smaller bags to stay organized at home and on the go. Crocheted bags are durable, washable, and completely customizable. That makes them practical for everyday life, and friends and family usually love getting them as gifts.
Where to Find Inspiration and Patterns
If you want a good jumpstart or want to practice a new bag construction, loads of resources are out there. Ravelry’s scrap bag patterns are community-tested and free. Attic24 has popular tote tutorials with step by step instructions. Social media hashtags like #scrapyarnbag will lead you to finished projects, tips, and advice from other crafters too.
However you approach it, making crochet bags from leftover yarn is low-pressure and really satisfying. Every project is one-of-a-kind. With a little time, you’ll have a useful bag and less stash to organize. If you’re looking for your next fiber challenge, grab those scraps and get stitching!